Re-Flashing a Smacard
There are a few reasons you might want to flash different files onto a smacard. For example, loading custom content, or loading the contents of another card. This is a simple tutorial to show you the step-by-step process. All it requires is some very simple hardware and software.
You will need:
- AsProgrammer, or equivalent
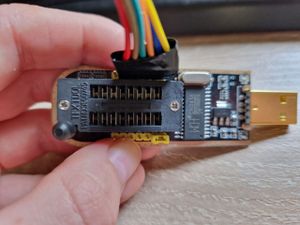
- A CH341A Programmer
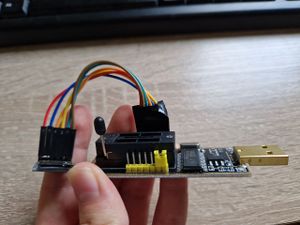
- A Micro SD Card Module For Example (There are 2 types. Ensure the one you get has a short metal connector, not the long version. And that the pin header is pre-soldered)
- 6 Female to Female Jumper Wires For Example
Step 1 - Assemble the card reader
It's a simple job of plugging cables in the right places.
Cable colour doesn't matter as long as you keep the order the same.
For mine I did:
On the SD Card Module (left to right)
Red, Blue, Orange, Yellow, Green, Brown
On the CH341A (left to right)
Red, Brown, Green, Orange, Blue, Yellow
Refer to the pictures to ensure you've put them in the correct place


Step 2 - finish the guide!